Basic Draytek Hardening Guide
I’m a bit of a closet fan of Draytek Routers/Firewalls. Given a choice of device for a small office at a budget of < £200 they give quite a bit of bang for your buck, with support for IPSEC, SSL VPNs, ingress/egress firewall rules, ability to create groups and objects, IP restricted remote access and remote syslog built in.
Like anything though, it’s how you configure them that counts, and I’ve not come across many out there with a non-standard configuration. This guide uses a 2830 but the interface is fundamentally the same for most models.
Changing Default Credentials
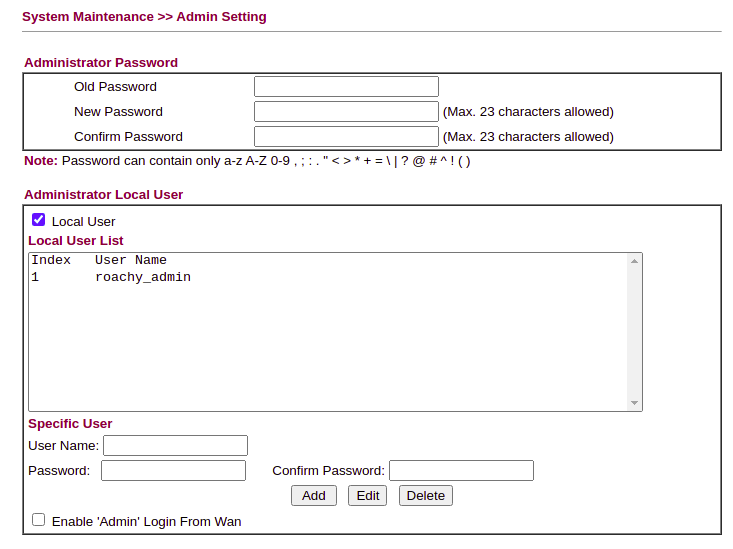
First of all, head into the System Maintenance » Admin Setting Menu and create a new Admin user for each Administrator you have and change the existing Admin password to something suitably long and complex:
Update Firmware
It sounds obvious, but make sure you’re running the latest firmware version for the device you have in System Maintenance >> Firmware Upgrade. When downloading firmware from the Draytek site, you’ll have 2 options, a .RST file and a .ALL file. The .RST will reset to factory settings on the latest firmware, so to keep your configuration select the .ALL).
Disable Unnecessary Services
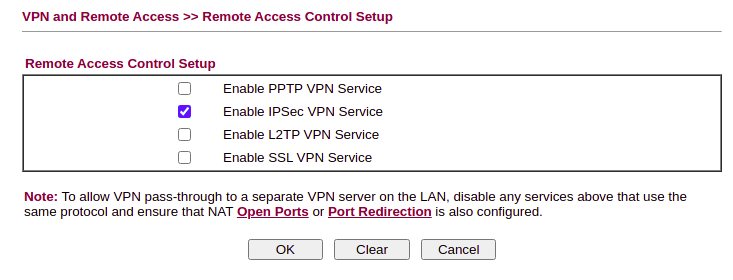
The golden rule – if you’re not using it, disable it. Check IPv6 is turned off if you’re not passing v6 to the WAN, disable any unused VPN Services (VPN and Remote Access >> Remote Access Control). Ensure PPTP is off at a minimum.
If you have a wireless model, remember to disable WPS.
Defining Service Objects
The Drayteks allow you to define objects and groups, but don’t have any pre-configured, so they need to be manually defined. Head into Object Setting >> Service Type Object and start populating with commonly used ports:
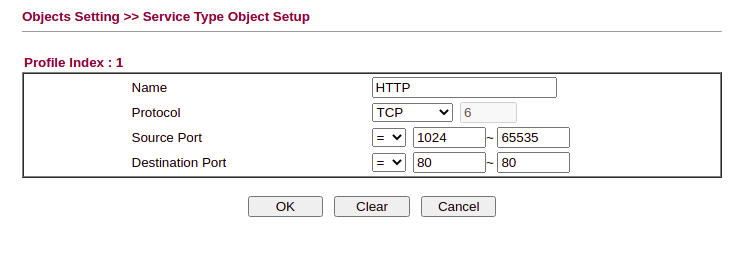
At a minimum, you probably want to define HTTP, HTTPS, DNS, NTP, SMTP/S, IMAP/S, SSH and FTP. Add anything else as needed and then copy the services into groups (such as HTTP and HTTPS)
Backup
If you are setting up multiple devices, this is the right time to take a baseline config backup as a template for other devices.
Defining IP Objects
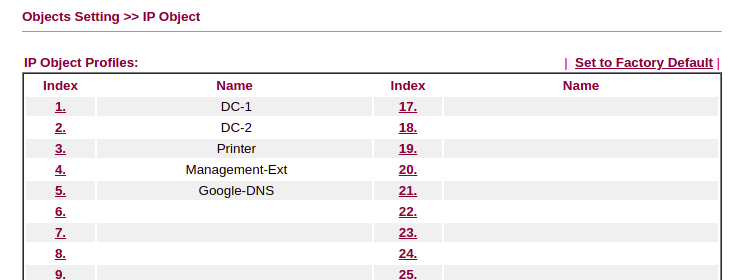
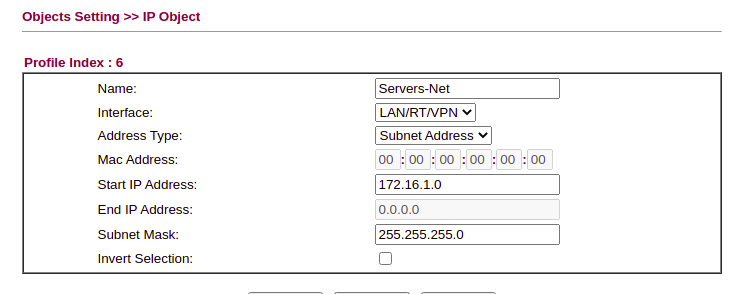
Next we need define IP addresses for remote and local servers as needed. If, for example you run an Active Directory domain, add the Domain Controllers into the IP Objects to allow us to create a granular ruleset for egress traffic. For example, if you’re using a multifunction printer/scanner that needs outbound access, define this here as well.
Specify any external hosts that you might want to NAT through, and any public services you use (such as Google DNS – 8.8.8.8)
Each of your network ranges for VLAN’s should also go here:
Configure VLAN Settings
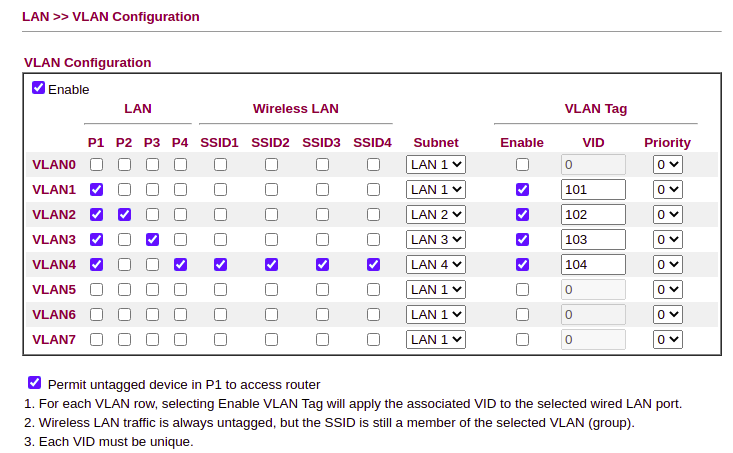
The Draytek supports either port-based or 802.1q VLAN tagging. In LAN >> VLAN enable VLAN’s and set up as needed.
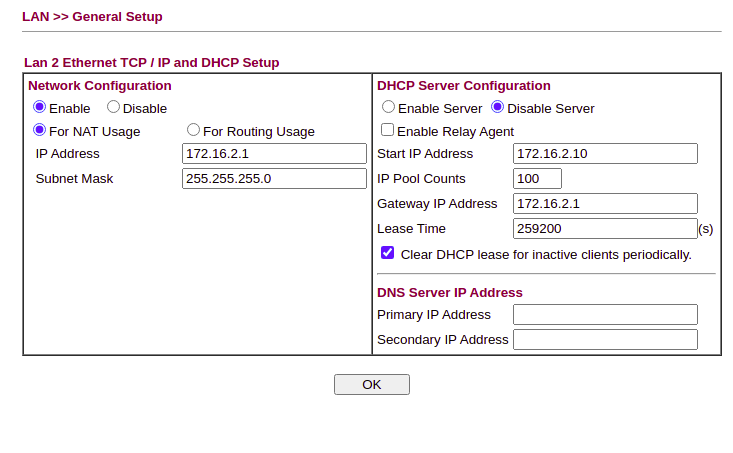
Then under the LAN, define the address for the Draytek on each of the LAN’s configured & enable/disable DHCP as needed:
Syslog
The next step is to set up syslogging to a remote syslog server. I highly recommend this, as the built in syslogs have very limited capacity and being able to review logs will assist with debugging issues and reporting:

With a working syslog server you can also use Logwatch to monitor for IoC’s or behavioural issues. I’ll write a separate blog post on this at some point.
Inbound NAT Rules
Inbound NAT rules can either be created using the NAT >> Open Ports or NAT >> Port Redirection options – if you’re translating the same ports or multiple ports to a single host, I’d suggest the Open Ports tab. If you’re redirecting traffic on a different external to internal port then use Port Redirection. Note that if you apply a default deny policy as per this post, then you’ll need to define matching inbound firewall rules.
File Type and Other Restrictions
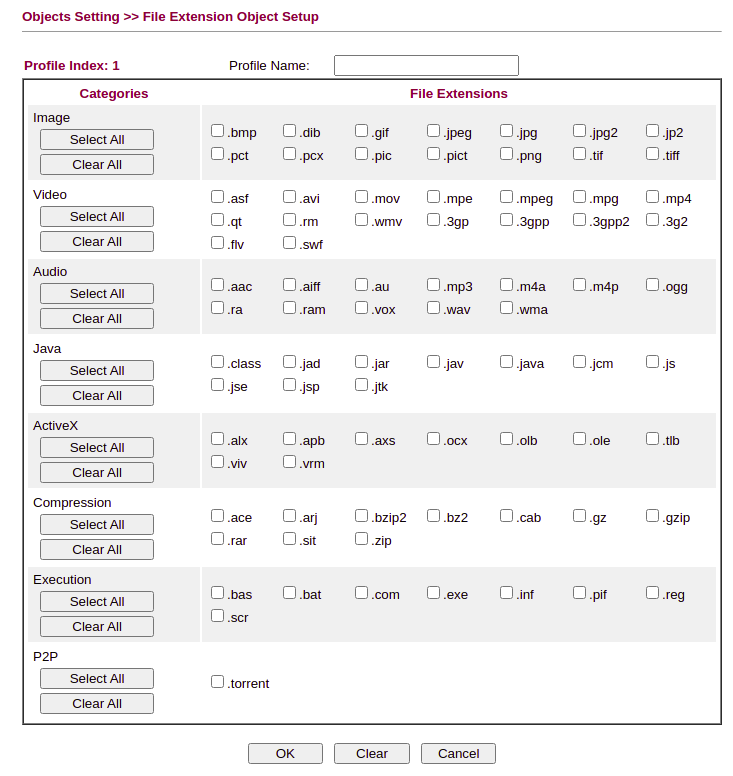
It’s possible to buy an additional, inexpensive licence for web content filtering. Unlicenced, the Drayteks support URL and Filetype Content Filters which can be tuned as needed.
Firewall Rules
The Draytek comes with a “Default Allow” ruleset. Before changing the policies to “Default Deny”, define the explicit rules that you need under the Firewall » Filter Setup tab.
For example, we only want the Domain Controllers to be able to make NTP and DNS requests through the perimeter, so under “Default Data Filter” we add a rule stating:
Direction: LAN→WAN Source: DC1, DC2 Destination: Google DNS (8.8.8.8) Service Type: DNS
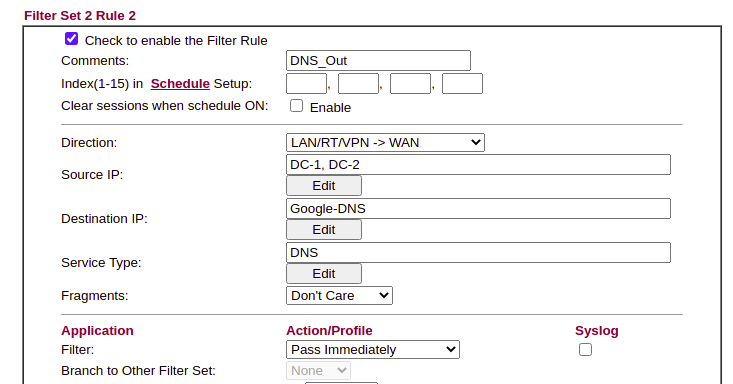
We can then ensure that all DNS requests are logged on the domain controller before being forwarded, and anything else is logged.
When you have more than 7 rules in filter set 2, remember to modify the field for “next filter set”. Remember to create explicit inter-vlan rules if needed.
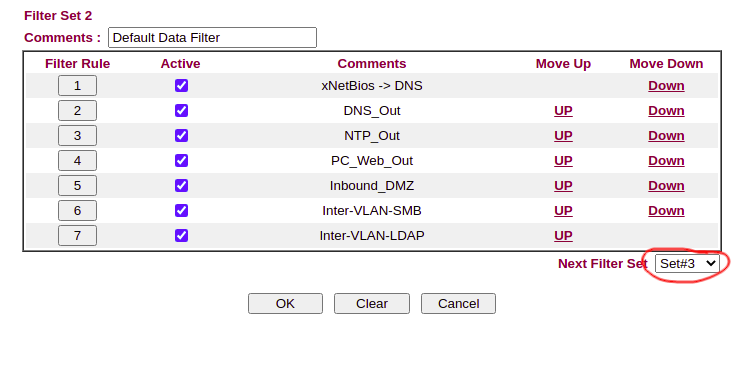
Once the rules are created, again, take a backup to ensure you don’t get locked out when applying the default deny policy.
Default Deny
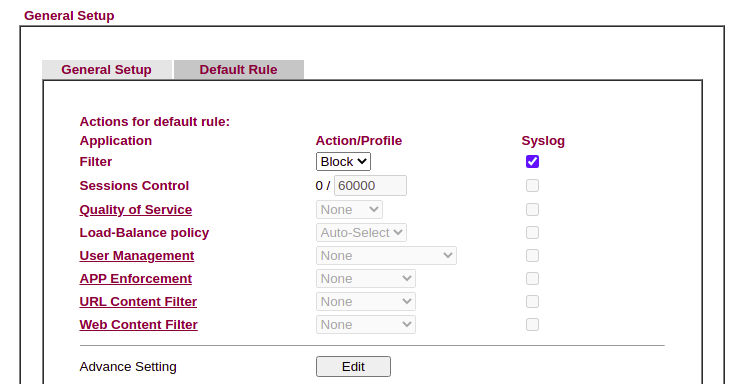
Change the Firewall >> General Setup, Default Rule to Block and check the box to Syslog.
Local/Remote Management
Head into System Maintenance >> Remote Management to configure policies. You can restrict the management interface of the Draytek to specific remote hosts, but also specific internal networks here.